I had another chocolate orange craving. It seems to happen periodically and I have no idea what triggers it.

This time it manifested itself in the form of these choux buns.
I have to be honest and say that I have never really been a fan of the Jaffa Cake – dry sponge, funny orange jelly stuff and not nearly enough chocolate on the top. Maybe I should try and make my own . . . anyway, despite my aversion to said item, chocolate orange is something I can always get behind, especially dark chocolate and orange, and frequently do.
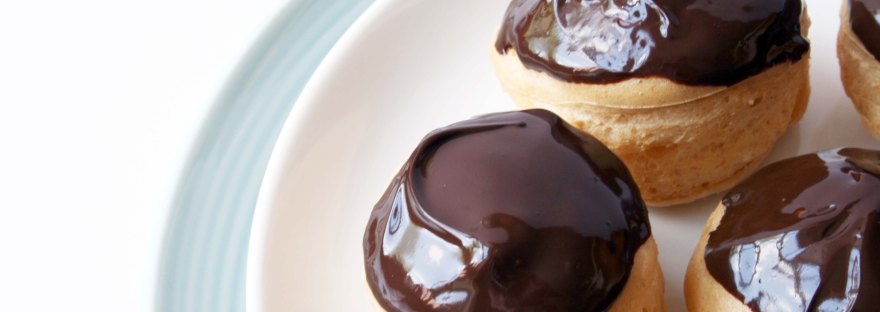
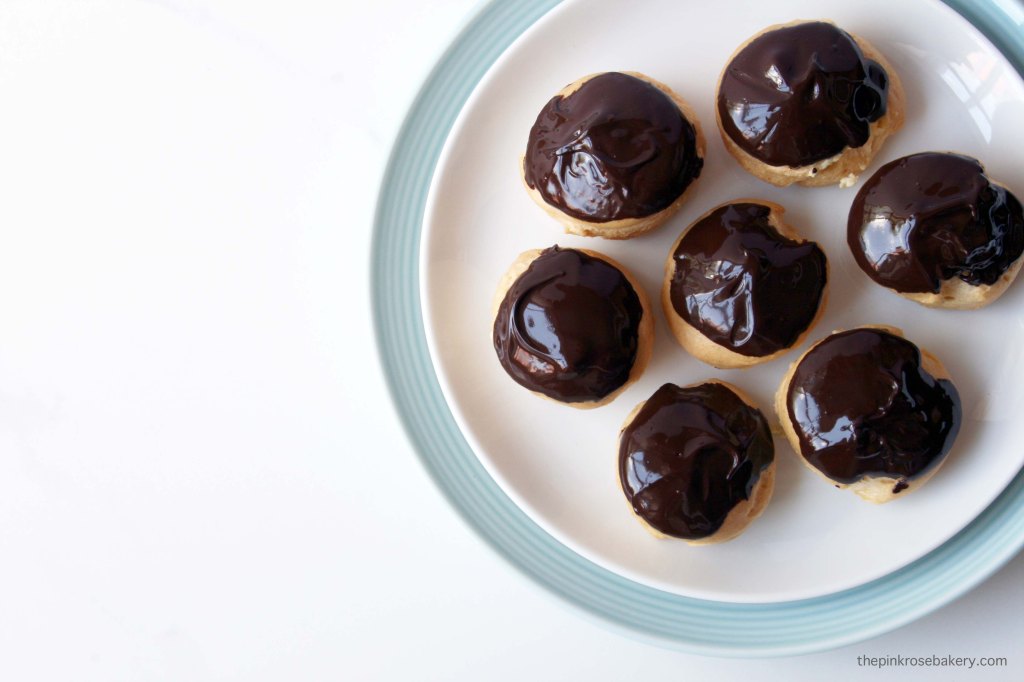
These puffy choux shells are filled with a slightly sweetened cream flavoured naturally with finely grated orange zest and then dunked in melted chocolate.

Given the uneven, slightly knobbly-ness of the choux buns a little chocolate painting may also be required after they have been dunked, in order to fill in some of the gaps, but that isn’t a problem, is it?
There are a few steps involved in making these but each one is fairly straight forward. I even think that gluten-free choux pastry is easier to make that ‘normal’ stuff, as there is no gluten to over-work, which in my mind makes it more forgiving.
Go on, it’s the weekend, time for treat, surely?!

Jaffa Choux Buns
Ingredients:
Choux Pastry:
- 225g water
- 60g butter
- 115g gluten free white flour blend*
- 3 medium eggs
- pinch of sea salt
* It is important to use a flour blend that does not contain xanthan gum. Doves Farm doesn’t (which I have used in the past) and neither does Marks & Spencer’s own (which I used for these particular choux buns. Unfortunately there isn’t a link to it on-line, but you should be able to find it in store).
Orange Cream:
- 300ml double cream
- 3/4 tsp sugar
- 3/4 tsp vanilla extract
- zest of 2 oranges
Chocolate Topping:
- 75g dark chocolate
Method:
- Start with the choux pastry. Pre-heat the oven to 220 Celsius / 200 fan / 425 Fahrenheit. Line a large baking sheet with non-stick baking paper.
- Place the water, butter and salt in a medium saucepan and heat gently until the butter has melted, then bring up to a gentle boil.
- Take the pan off the heat and tip in the flour. Beat with a wooden spoon until smooth.
- Return to the heat and beat until it forms a soft sticky lump that comes away from the sides of the pan (mine did this almost instantly, but it will depend on the flour you have used).
- Transfer the dough to the bowl of a stand mixer and leave to cool for a few minutes until just warm. You can beat it a little bit to help speed up the process if you wish.
- In a separate bowl whisk the eggs until lightly frothy. Add them to the dough a bit at a time, beating well in-between each addition until the dough is smooth again. The end dough should be smooth, have a slight sheen and should be able to be piped, like a stiff cake batter. You may not need to add all the egg in order to achieve this.
- Transfer into a piping bag fitted with a large plain nozzle (or just snip the end of a disposable one, if using) and pipe your buns onto the prepared baking sheet. Tap down any peaks with a damp finger.
- Bake for 20 minutes, until puffed and just starting to colour, then reduce the temperature to 180 Celsius / 160 fan / 350 Fahrenheit and bake for a further 20 minutes until firm and golden brown.
- Turn off the oven and remove the choux puffs. Carefully create a hole in the bottom of each one with a skewer (to allow any steam to escape) and return the upside down puffs to the oven to dry out for a further 20 minutes. Transfer to a wire rack to cool completely.
- While the puffs are cooling make the orange cream: whip the cream in a bowl with the sugar and vanilla extract until it forms stiff peaks. Add the orange zest and mix to combine. Pop in the fridge until needed.
- When the choux puffs are cold, fit a piping bag with a medium-sized plain nozzle (a nozzle is required here to help get the cream into the choux bun) and fill with the orange cream. Using the skewer hole on the bottom of the choux buns as a starting point, carefully push the nozzle into the bun a little bit and fill each one with the cream. You will know when it is full as you will feel a little resistance against the piping bag and the bun will become heavier.
- Melt the chocolate in a bowl and dunk the top of each bun in it, filling in any gaps afterwards. Place in the fridge to set.
© The Pink Rose Bakery 2015

Oh wow, these look incredible! Now I’m craving chocolate, and choux, and chocolate orange!
xx
LikeLike
It’s always a good combo, isn’t it?! x
LikeLike
What a cute twist on choux buns! I may just have to try this!
LikeLiked by 1 person
Let me know what you think if you do 🙂
LikeLiked by 1 person
Oh yum! I have been looking for a recipe for choux and this looks so good. Will definitely be trying this one out soon. 🙂
LikeLiked by 1 person
Let me know how you get on 🙂
LikeLike
Mmmm…. I’m thinking chocolate custard inside and coffee icing… The minute I saw these I had a moment of nostalgia, remembering a trip to Paris in the early 80s, drinking coffee and eating a delicious mocha ‘religieuse’ – just divine! You make the choux pastry sound very simple, and I’m going to have to give it a go!
LikeLike
Chocolate custard and coffee icing – right, that combo is going on the list! And I now have a sudden craving for coffee doughnuts. I think I little revision of the making list is required . . .
LikeLiked by 1 person